Cart
.


$
0.00
x
1
$
0.00
Remove
There's nothing here... yet
Pick a fabric, choose a design (or upload your own) and we’ll turn it into something beautiful.
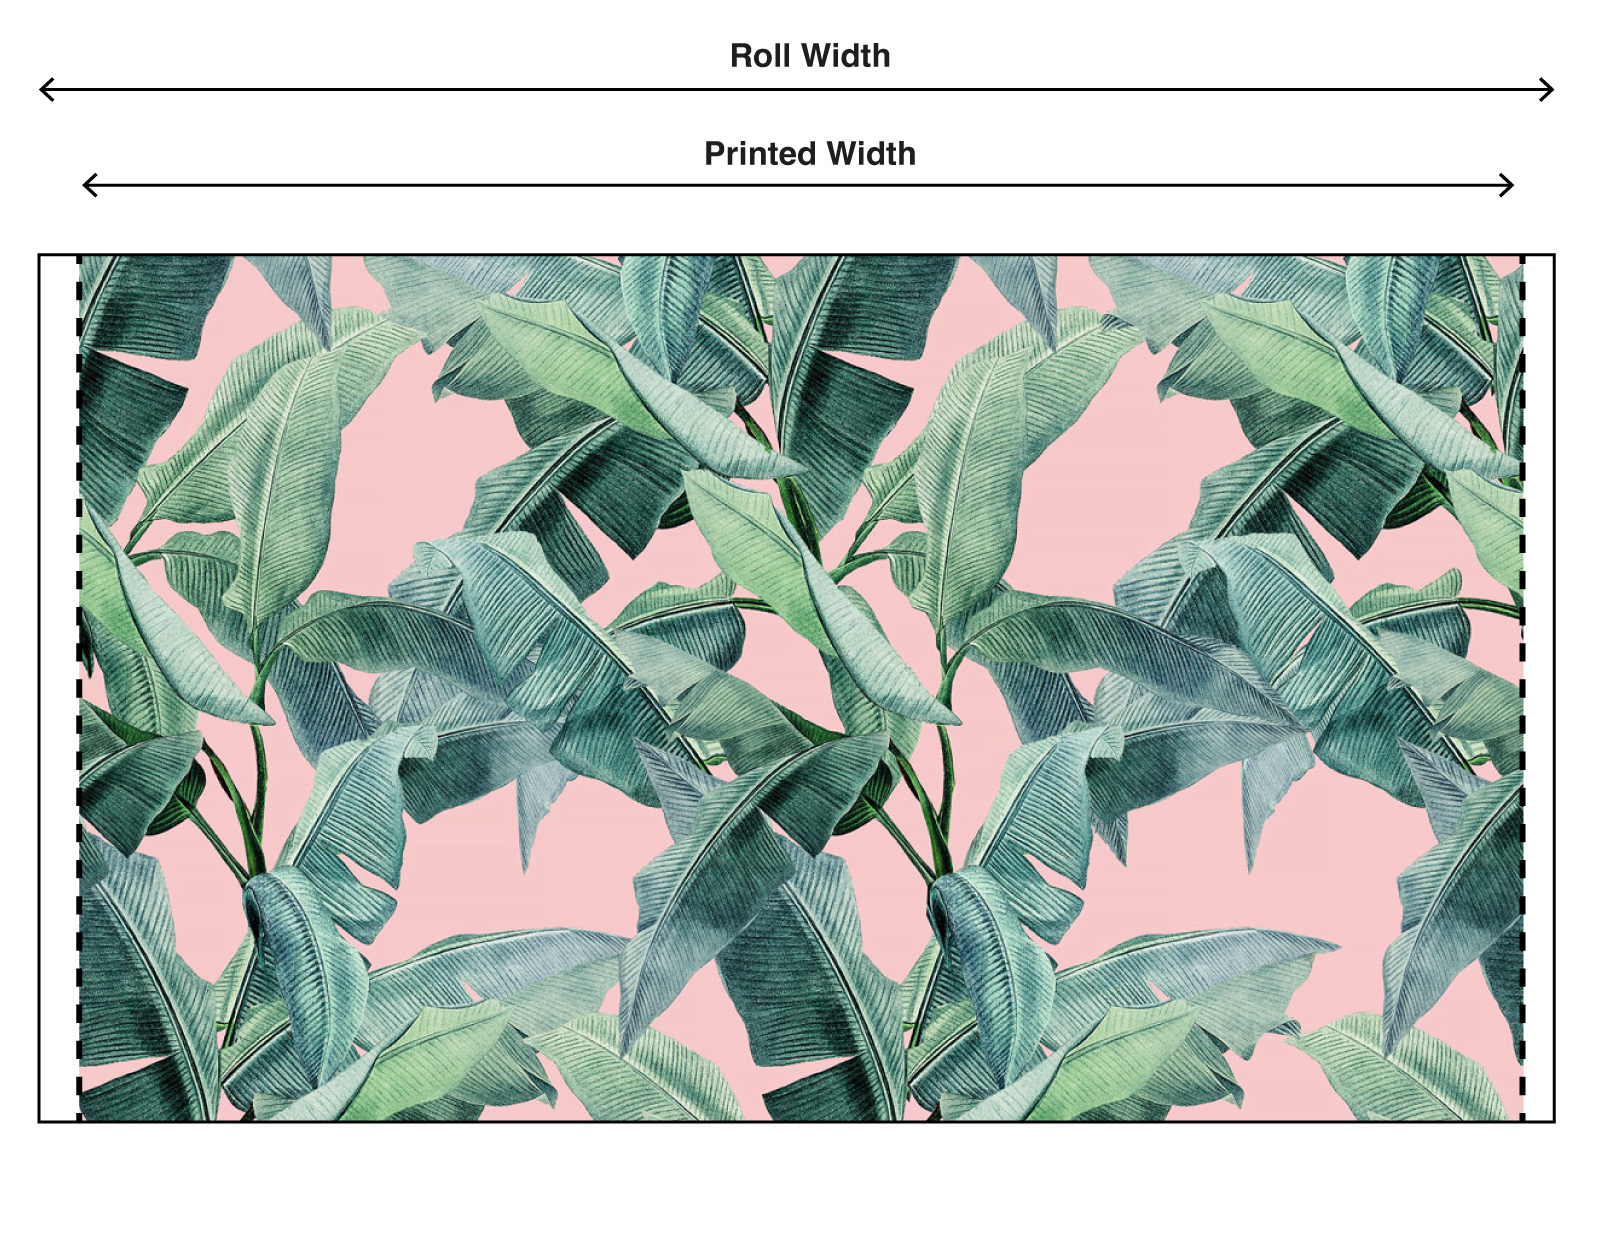
This white edge is part of the printing process and ensures your design is produced at the highest quality right to the very edge. Before you hang your wallpaper, it just needs a quick trim so that when the panels are applied, the design lines up seamlessly.
Leaving the white edge on will cause visible lines in the finished wall, breaking up the seamless look of your mural or pattern. Trimming ensures every panel joins perfectly, so the final result looks polished and professional.
At Mereton, we want your wallpaper to be as easy to install as it is to love. With a little bit of prep, you’ll have a flawless, custom-printed wall that’s uniquely yours.