Step-by-Step Guide For Creating a Pattern Repeat in Adobe Illustrator
February 8, 2024
Want to learn the 7 EASY PEASY steps to create seamless repeating patterns in Adobe Illustrator? We’ve got you covered.
If you’re more of a visual learner, you can check out this video tutorial we created here, or simply read on and follow along below.
How to setup a pattern repeat in Adobe Illustrator
Step 1 – Setup your artboard
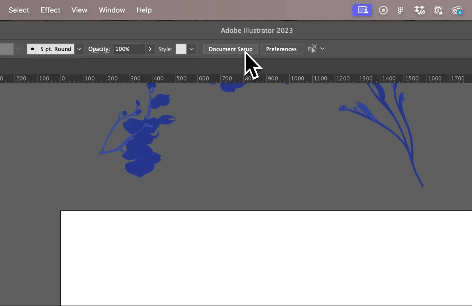
Open Adobe Illustrator and setup your artboard to a size that works for you. For the sake of this tutorial, we’ve chosen a nice square at 1000mm x 1000mm.
Setup your artboard
Step 2 – Create or import your motifs
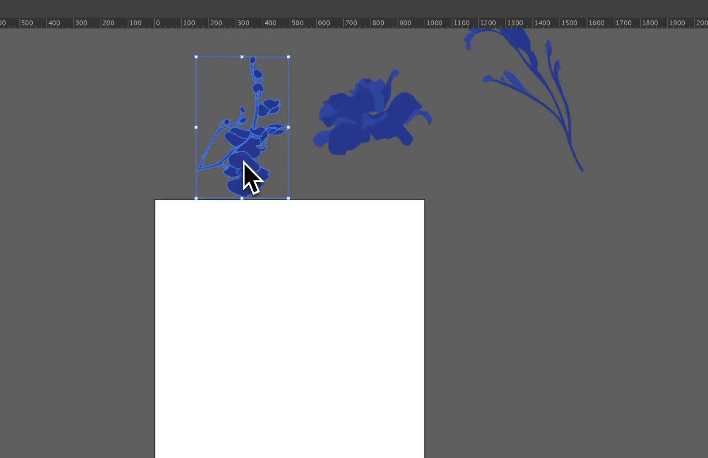
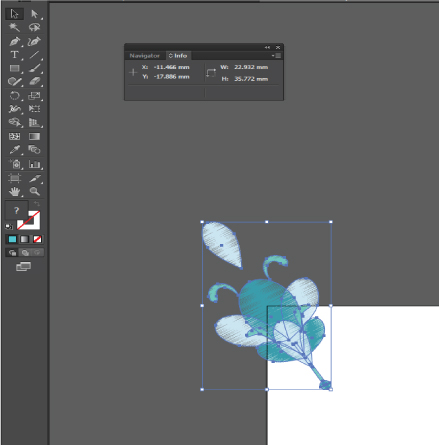
Get creative by drawing motifs using the Pen tool, Pencil tool, Shapes, or the Blob Brush tool. Create a separate layer for each motif to keep things organised.
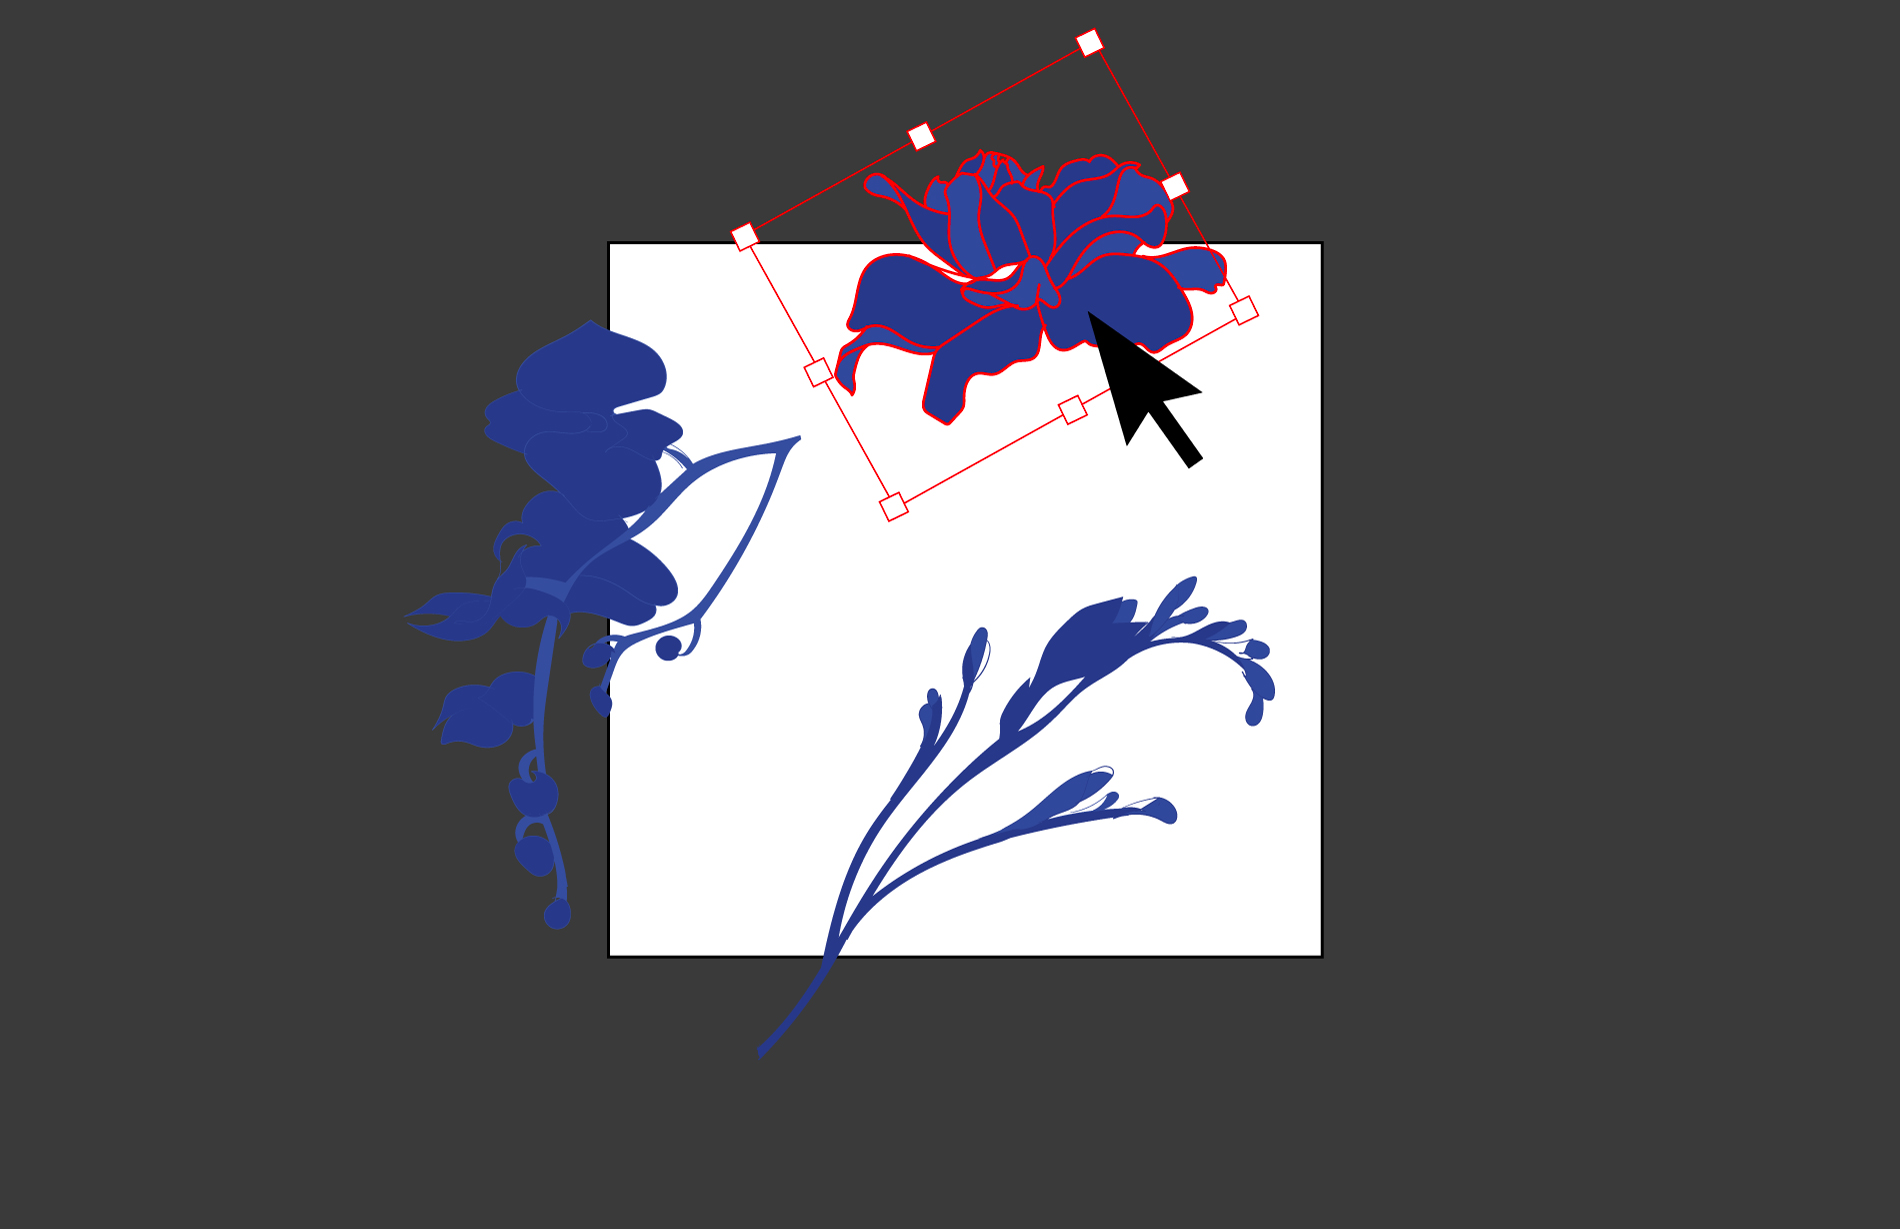
You can do this simply by first selecting all of your motifs.
Then click Object > Pattern > Make.
Enable the pattern maker tool by selecting Object > Pattern > Make
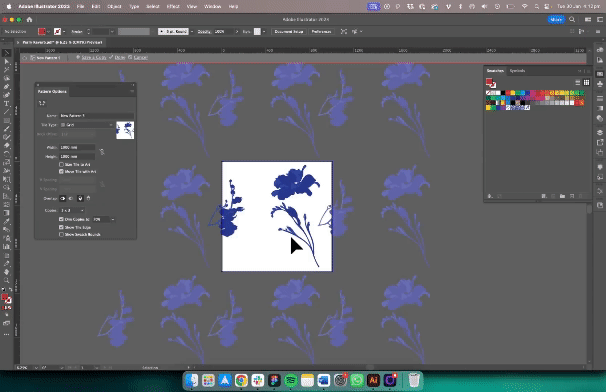
Step 4 – Set your repeat options
Now you have a dialog box pop up with options for your pattern repeat.
In the dialog box, set up your desired repeat size in the width and height boxes (e.g., 1000mm x 1000mm) – this way it matches your artboard size and keeps the visual nice and easy to follow.
Then, choose the repeat type you like. Hexagonal repeat is pretty cool! Click through each of them to get a feel for what they do. For this tutorial we’ve picked Grid.
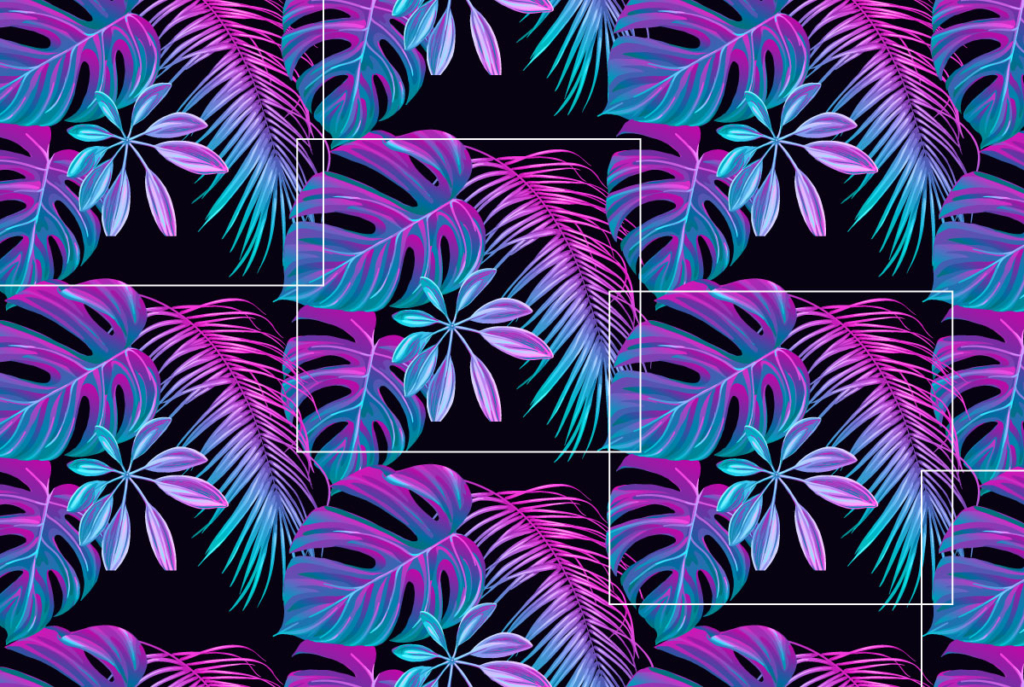
Adjust the Copies setting to visualise the pattern repeat. A good setting is 3 x 3 as this allows you to see your new repeat on all sides, providing an overview of how your pattern will look on a larger scale
Pattern Options dialog box in Adobe Illustrator
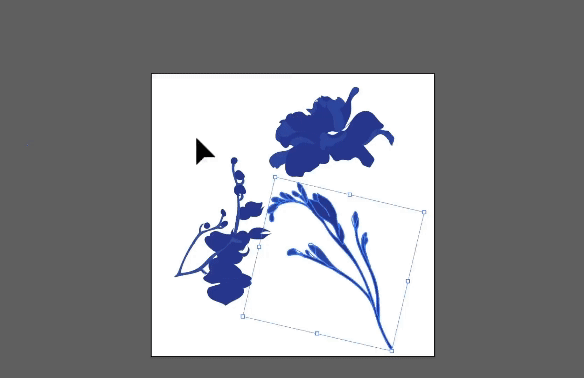
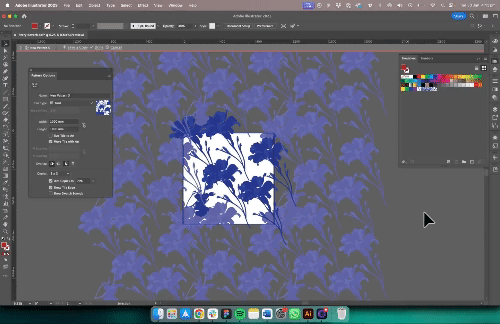
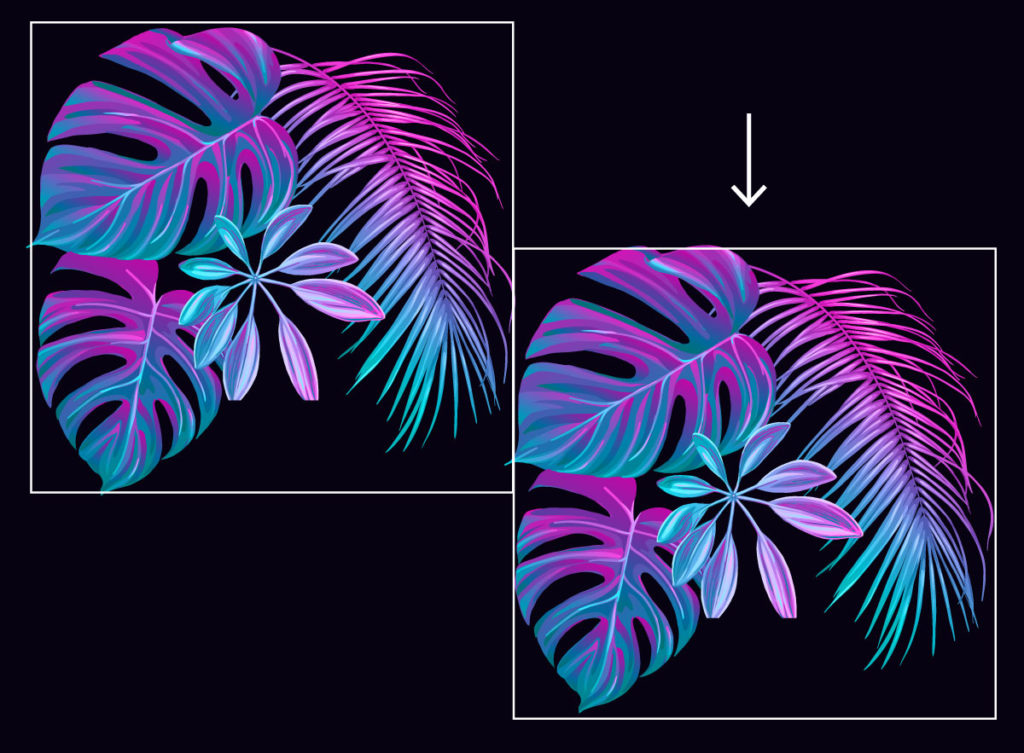
Step 5 – Play around with the motifs
Move your motifs around the artboard to see the replication at the top, bottom and both sides in real-time just like the below image:
Move pattern pieces around your artboard
Step 6 – Save your creative goods
Finally, double-click anywhere else on the screen to finish and close the pattern maker tool.
Your pattern will then be saved in the Swatch library on the right side of your screen.
If you can’t see swatches, click on Window > Swatches.
Double click anywhere else on the screen to close the tool
Step 7 – Your pattern is ready!
Select your swatch from the Swatch library, then use the rectangle tool to create a shape with your repeated design.
Select your swatch in the Swatch library
Viola!
By following these steps, you can easily set up a pattern repeat in Adobe Illustrator.
At Mereton, we’re you’re go-to destination for all things textile printing. We’re known for infusing our designs with personality, and Adobe Illustrator is our trusty go-to for bringing our unique patterns to life. Whether you’re a novice or a seasoned pro, mastering the art of pattern repeating in Adobe Illustrator is the key to unlocking your full creative potential.
Stay tuned for our upcoming series of tutorials, where we’ll be sharing expert insights and step-by-step guides on textile and printing techniques.
The 4 Types of Pattern Repeats
October 10, 2018
Ah, repeats! Choosing a repeat style for a design can be tricky as there are so many factors to consider.
Does it look right? Is it too repetitive? Is the scale too large? Does it look forced?
The questions never end in the quest for the perfect design so we put together this guide to help you narrow down the best choice for your pattern repeat.
Now, lets get to what the 4 types of pattern repeats are!
The 4 types of pattern repeats are:
Full drop
Half drop
Mirror
Continuous
All are fantastic in their own right and can be used for many different styles of designs. Some are better suited to certain styles than others, depending on the motifs being used and the overall look you’re trying to achieve.
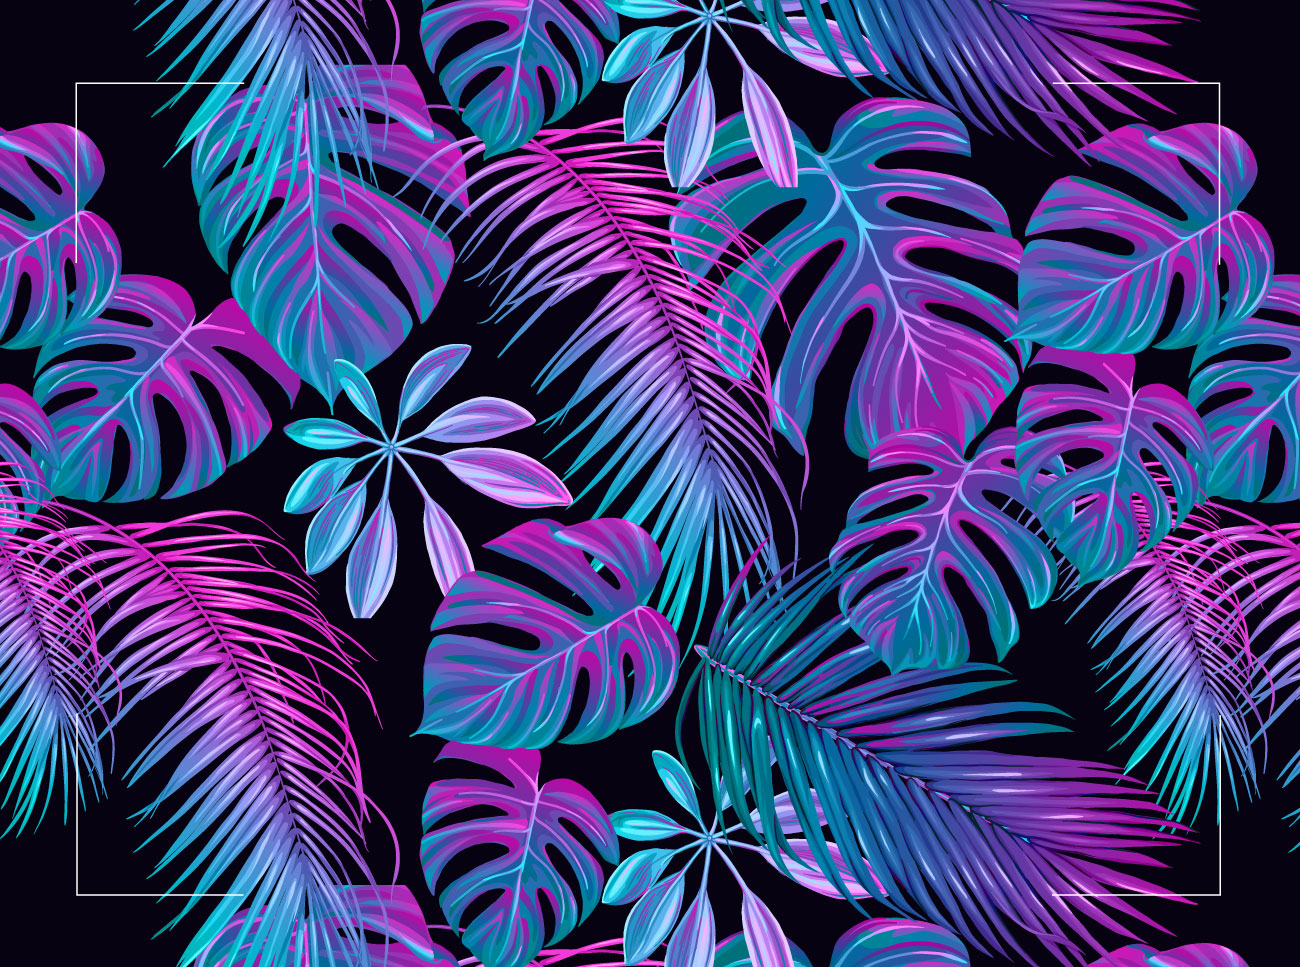
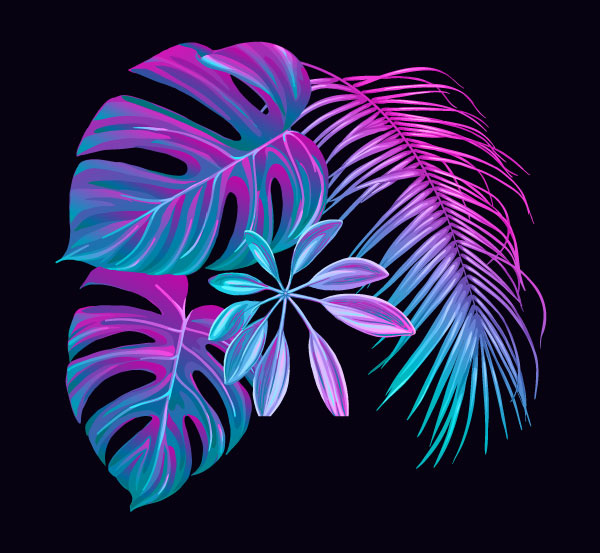
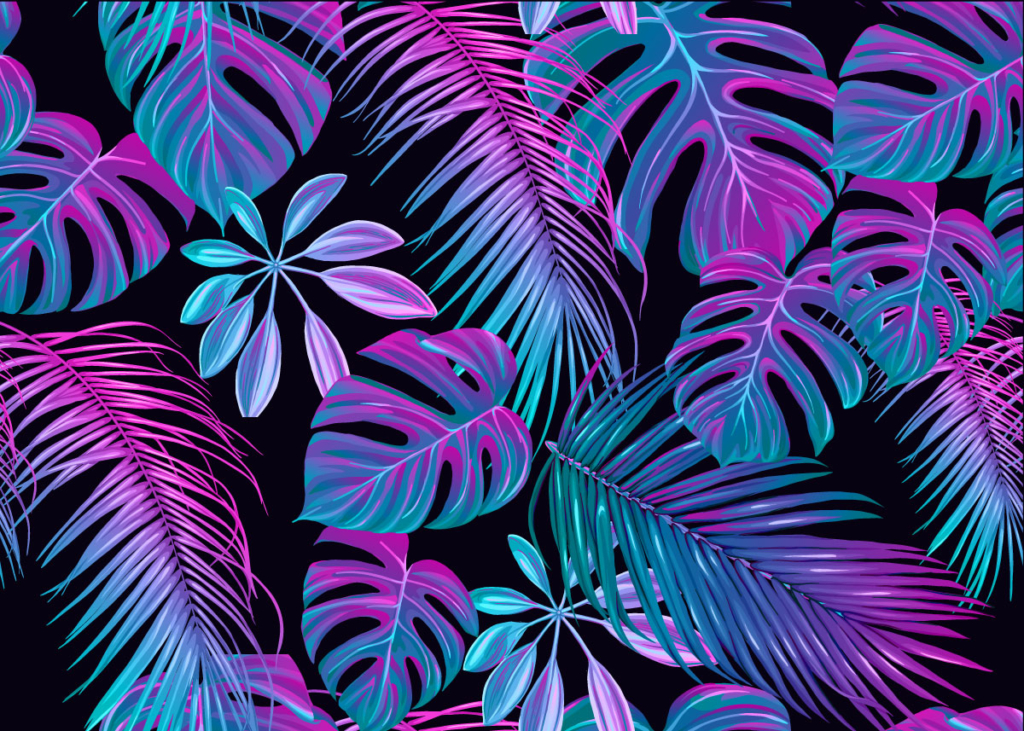
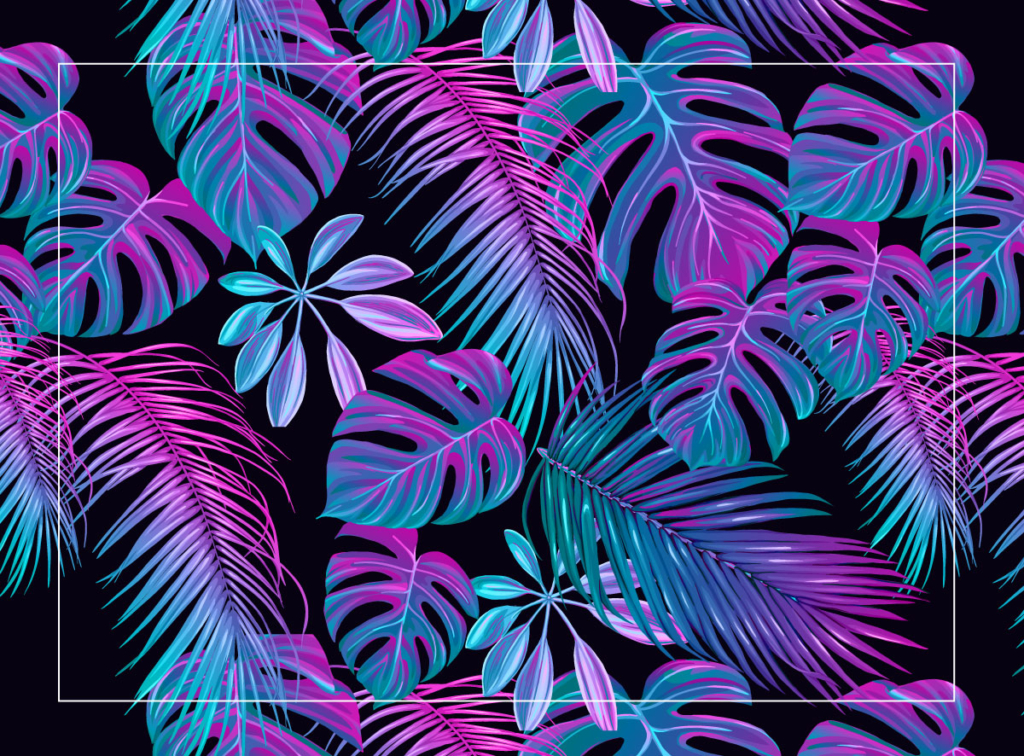
This is the motif we will be using throughout this article, a happy Neon tropical design:
Pattern Motif
Below are images and descriptors on each type of pattern repeat. Happy reading!
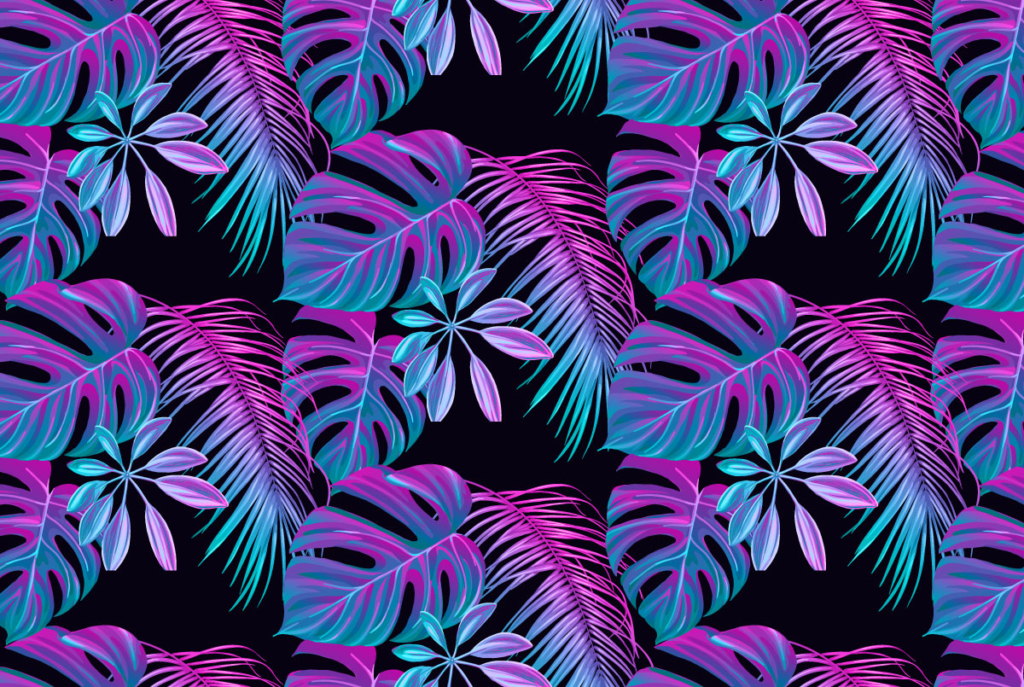
1. Full Drop Repeat
Full Drop Pattern Repeat
A full drop repeat is the most simple of all repeats.
To create a full drop repeat you simply multiply your motif along the same line horizontally and then do the same again vertically.
Doing this will result in a design similar to the one above. This kind of repeat can sometimes look repetitive, depending on the motif used.
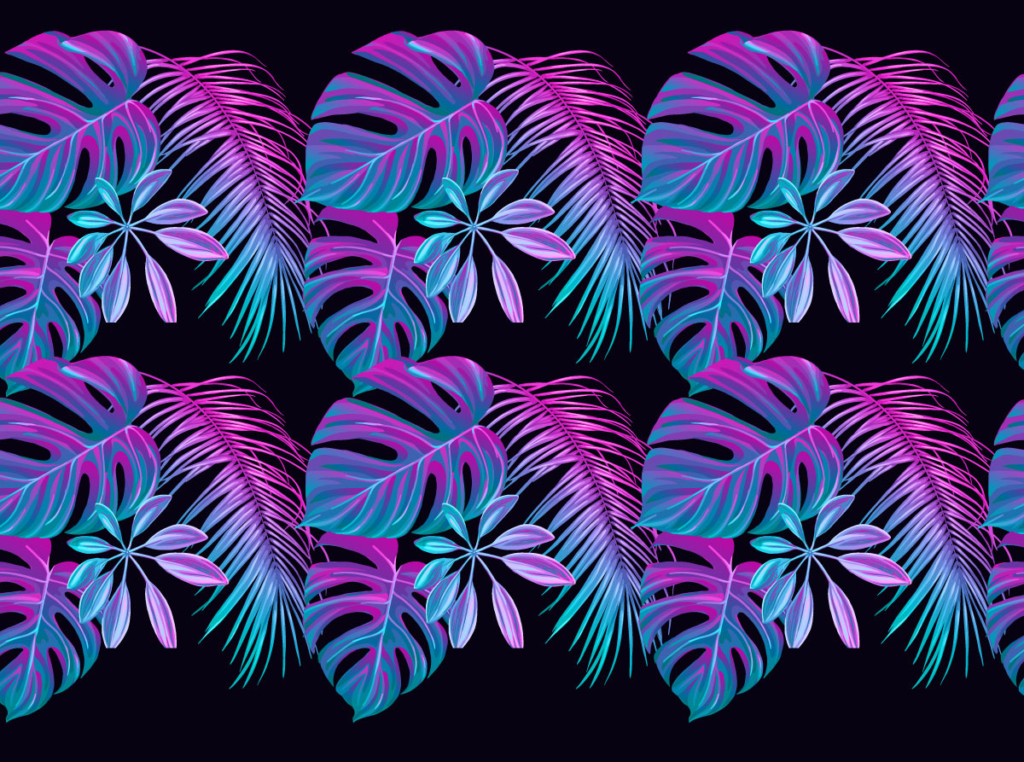
2. Half Drop Repeat
Half Drop Pattern Repeat
A half drop repeat is often desired to break up the uniform look that a full drop repeat can sometimes give.
To create a half drop repeat, copy your motif horizontally. Then align the top of the second motif to the center of the first motif. See the below illustration:
Half Drop Step Example
Once this is done, you then duplicate both motifs at the same time along the same horizontal and vertical lines.
You can see from the white outlines applied to the repeat below how the pattern is stepping using the half drop technique.
Half Drop Pattern Repeat With Outline
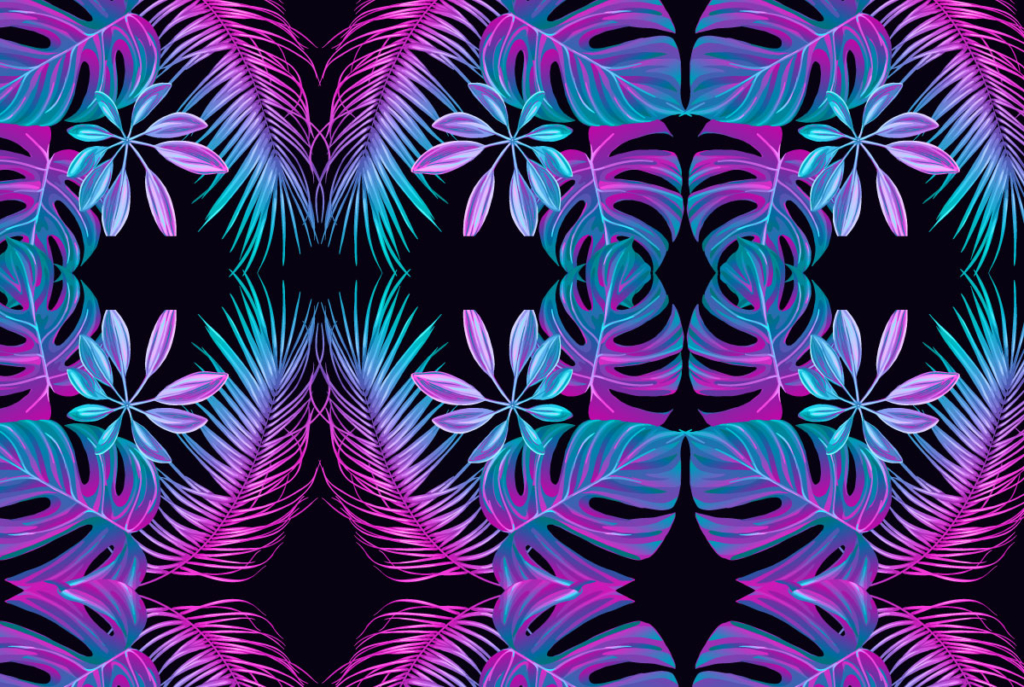
3. Mirror Repeat
Mirror Pattern Repeat
A mirror repeat can provide quite an interesting look if done right. Depending on the motif, you can sometimes end up with odd bits that have mirrored, creating a new object and now look a little out of place – or it could look like some totally inspired, trippy piece of art!
To create a mirror repeat, you duplicate your motif horizontally and then select the ‘mirror’ option in your design program. In Adobe Illustrator the option is to select Transform and then Flip Vertically and Horizontally.
You then duplicate both motifs across the same horizontal.
Repeat this process vertically and you will have an all over mirrored repeat.
4. Continuous Repeat
Continuous Pattern Repeat
A continuous repeat is possibly the most difficult, though it can be the best looking for any motif. A continuous could feature the motif in any variety of ways, with all edges of the artwork lining up seamlessly.
To create a continuous repeat, you start by designating an area such as a rectangle.
Place your motif so that it overlaps one edge of the rectangle and sits half inside and half outside of it. You would then duplicate this motif and place it in the exact same position on the opposite side of the rectangle, like the below illustration:
Starting On the Edges for a Continuous Pattern Repeat
Depending on the design program you are using, there will be more involved to ensure an exact match. We will cover how to create the perfect seamless repeat in our next blog post.
Continue this both horizontally and vertically, with most of the outer edges repeating nicely. Now you can freely fill in the middle empty area with however many motifs you like.
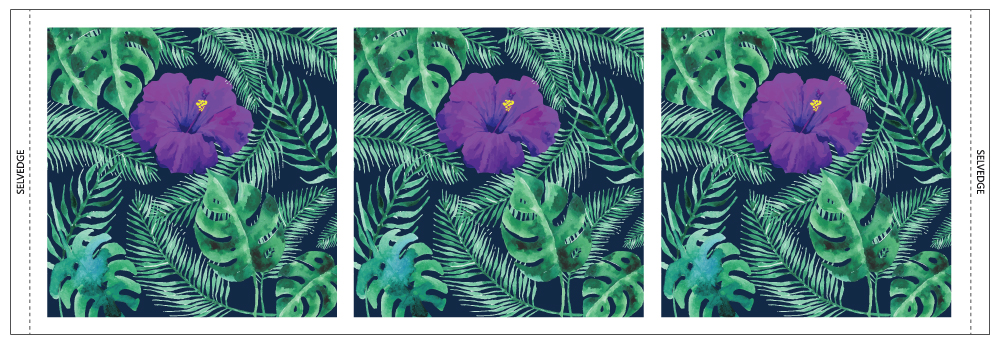
Crop your file to the exact size of the rectangle, discarding the elements sitting outside of it. In the image below, the white border indicates our repeated area that matches both horizontally and vertically when aligned together.
Continuous Pattern Repeat With Outline
Need assistance setting up pattern repeats? Our in-house designers can help.
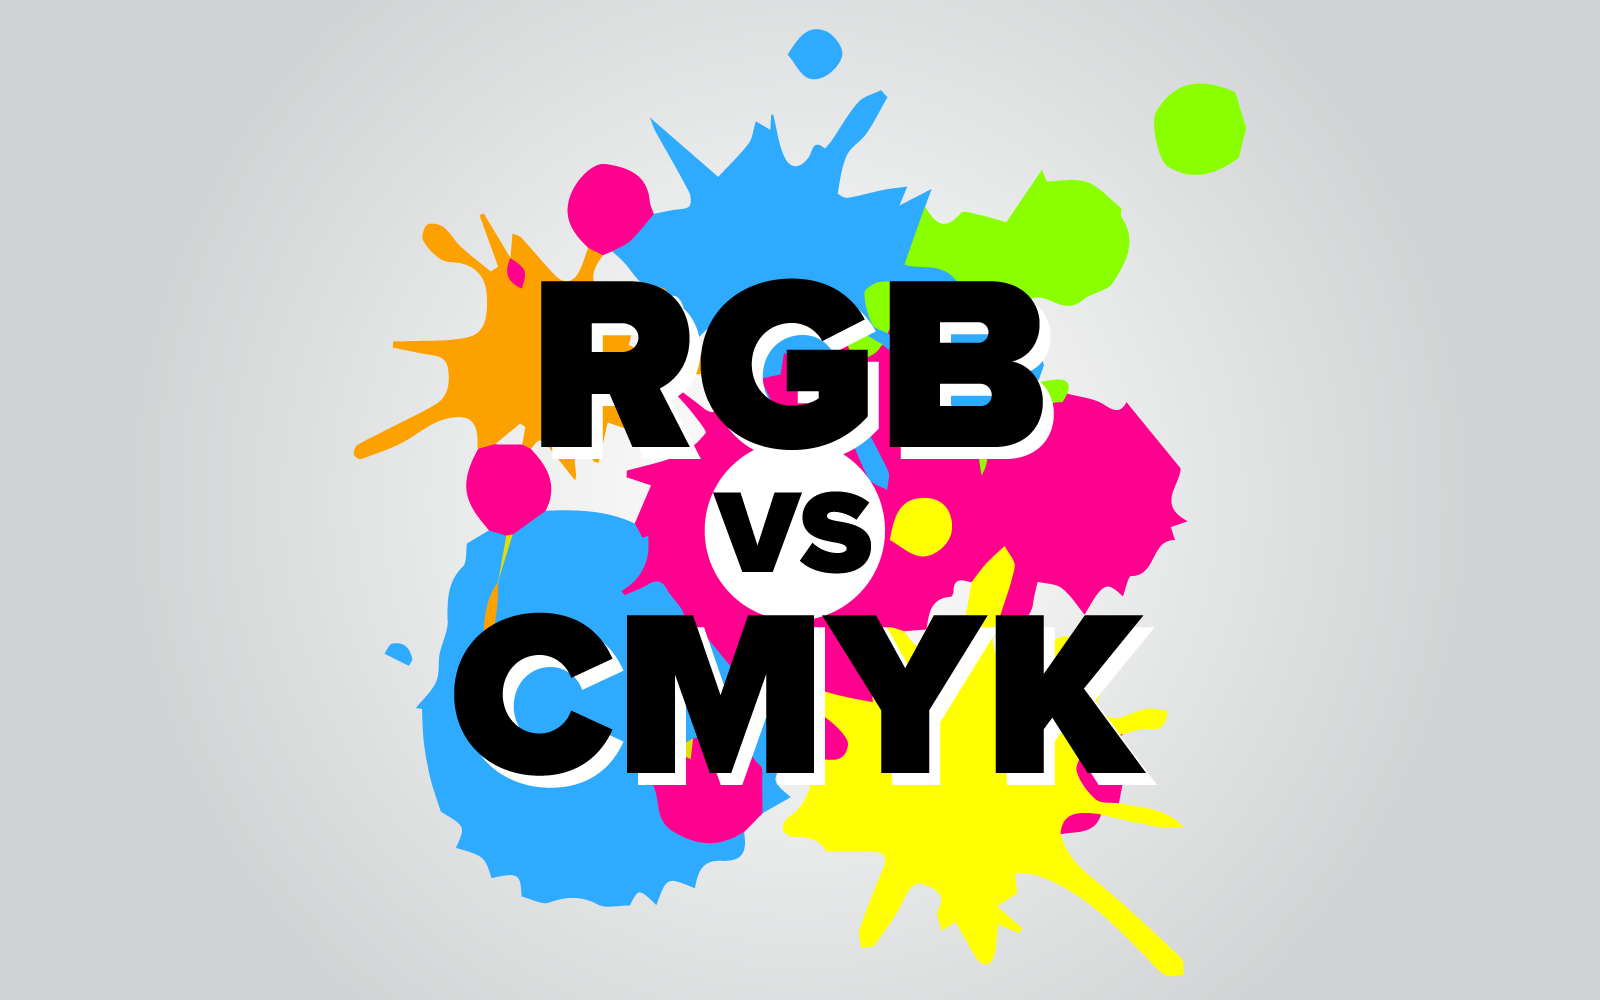
RGB or CMYK – What is the difference? When should you use them?
August 30, 2017
Have you ever wondered what the differences between RGB and CMYK are? When you should use each one and why?
Our 2 minute video below will explain exactly what each colour mode is and when to use them!
Don’t want to watch? Here are the basics:
RGB is what is called an additive colour model
RGB stands for RED, GREEN and BLUE.
RGB works by adding light to create the colours that you are seeing.
RGB should be used when you are creating graphics for viewing on computers, tablets, mobile phones, websites, or anything with a digital display.
CMYK is what is known as a subtractive colour model.
CMYK stands for CYAN, MAGENTA, YELLOW and KEY, which is BLACK.
CMYK works by subtracting light to create the colours you are seeing.
CMYK always starts with a light, or white base. For example, when printing fabrics, we always start with a white fabric and apply the CMYK inks on top.
CMYK should be used for printing media, such as paper, cards and fabrics.
How To Setup Cushion Placements For Printing
December 19, 2016
A common question we get asked here is: how do I setup a file to print placement cushions? The answer is quite simple really, and can be shown in just 4 steps.
There are a many benefits to printing placement cushions with the main two being that you ensure every cushion is printed identically.
Placement printing gives you full control of where your photo or motif lands on each and every cushion printed.
The tutorial below contains a step by step guide with images included to guide you through the setup process.
This tutorial is for intermediate users with some basic knowledge of Adobe Illustrator. This tutorial showcases cushions that are 45x45cm in size.
Lets get started!
Step 1
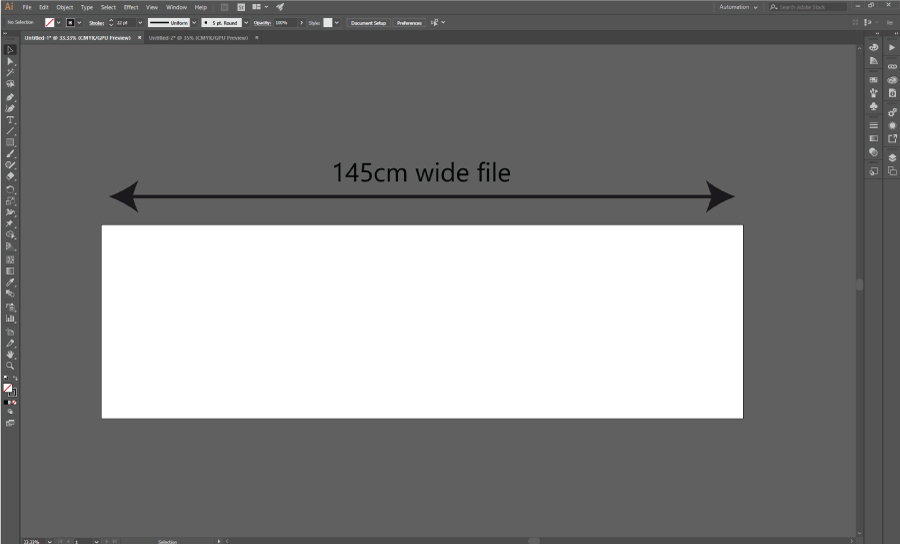
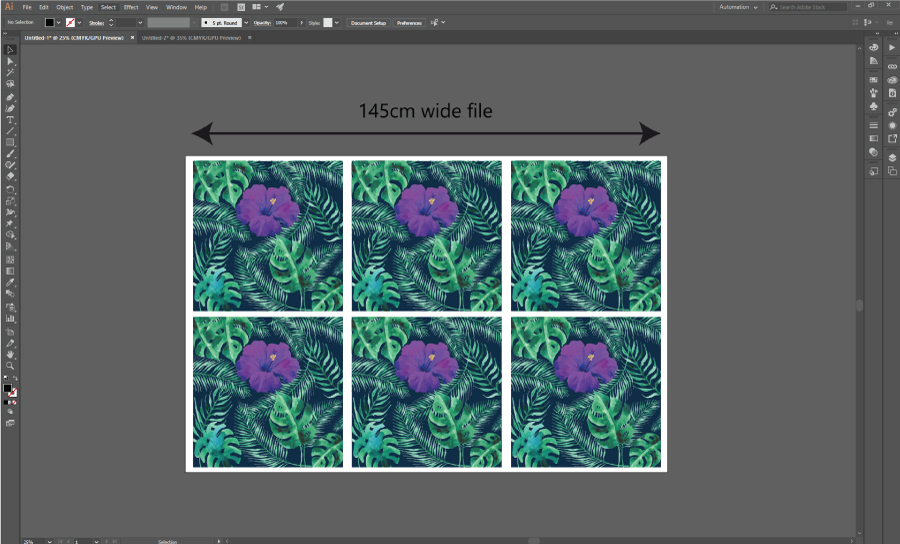
In Illustrator, set up your artboard to be the same width as the printable fabric width.
The printable width of our fabrics is 5cm smaller than the width of the fabric roll. For example: a 150cm wide fabric would have a printable width of 145cm.
The height of the file will vary, depending on your cushions. So for now just make it 50cm for ease and we can adjust later.
Step 2
Place your artwork in the file (ensuring it is the correct scale) and fit as many cushion placements across the width of the file as you can. Make sure you do not overlap any.
A 45cm x 45cm cushion can usually fit 3 times across the width, with nice gaps for cutting.
Step 3
Duplicate your cushion placements down the file the desired amount. You can usually get 6 panels (3 cushions) from approximately 1m.
We recommend setting your file up this way, as it allows you to multiply easily in equal amounts.
When printing, if you need 60 cushion (30 cushions) placements, you can make one file with 6 cushion placements (3 cushions) and we can duplicate it 10 times.
Please refrain from making your file’s height too large, anything under 3 metres in height is ideal.
Step 4
Crop excessive white space from bottom or top of your file to avoid paper or fabric wastage, then send it over to us for printing!
You’re done!
Save as an editable PDF in Compatibility Mode: Acrobat 4 (PDF 1.3)and you’re ready to go!